
Thongs and Queenslanders in the Aussie snow 2018 – DAY NINE
Below you will find a detailed description of the route as seen through the eyes of its creator to give you firsthand knowledge of the type of experiences available along this route
The Below map is for reference guide only with interactive info on locations along the route.
A fully interactive and directional guide map is available with the Road Trips printable detailed itinerary for $5 using the below button(coming soon)
Marlay Point Foreshore Reserve to Jan Juc beach Parking (316km, 5.14hrs)
1. MARLAY POINT RESERVE to LONDON BRIDGE LOOKOUT 265km 3.24hr – London Bridge Rd, Portsea VIC 3944
The south coast can be ferocious in winter, but who’s not up for drama? Cold and windy and dodging tides, but well worth it. We stopped at the London Bridge lookout in Portsea before heading for the Ferry. A spectacular rock formation that forms a natural arch. The best view is from down at the beach level, but check the tides so you can walk around to the bridge. It is also a very popular spot, so winter will lessen the numbers there with you.
Walk up to the lookout on the right or head left down the ramp onto the beach. Facing the water’s edge, head right for 200m on the sand.


2. SEAROAD FERRY 7min, Esplanade, Sorrento VIC to Queenscliffe Harbour (departs on the hr, 40min trip)
We took the van on the Searoad ferry. a roll-on/roll-off vehicle and passenger ferry service between the heads of Port Phillip, near Melbourne, Victoria, Australia. The route operates between terminals at Queenscliff on the Bellarine Peninsula and Sorrento on the Mornington Peninsula. The first boat ride with the van and only took about 45min; much more interesting ride than driving all the way back and around Port Phillip

2. JAN JUC BEACH 62km, 2.7hrs Carnarvon Ave
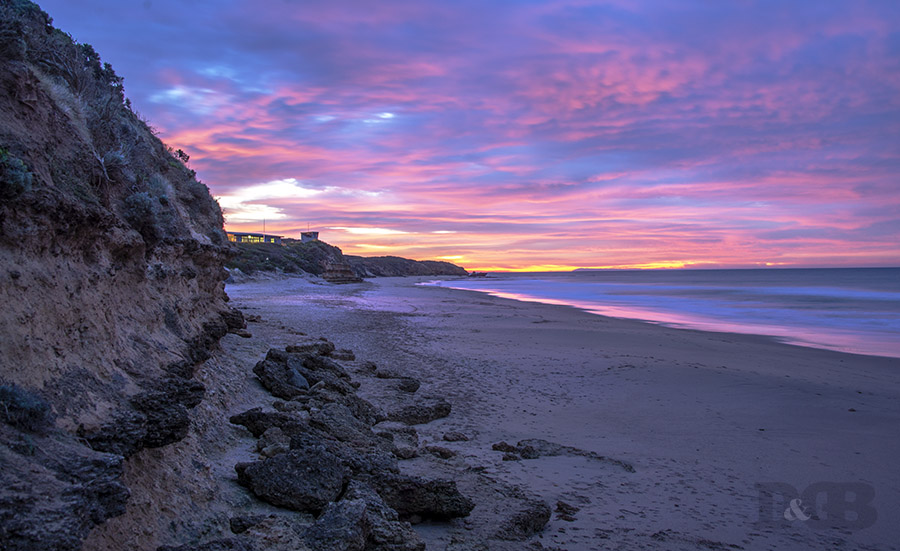
FREE camp spots are great when travelling on a strict budget. However, a lot of areas do not allow this. One trick is to ensure you travel in the off seasons(especially winter). For self-contained setups, you can often find sizeable deserted beach car park areas to stop for the night. Such was this night stop at the end of Carnarvon Ave Jan Juc beach. We are firm leave it as you find it travellers, and were gone early the next morning. Yet was still able to enjoy the beach sunset and sunrise.
There are toilets, nice boardwalks, and walking tracks along the cliff top. Alternate night stop in the info sheet

Capturing Great Sunset and Sunrise photographs
Plan your shoot:
Research the location: Find a good location with an unobstructed view of the horizon. Scenic spots like beaches, mountains, or open fields often make great choices.
Timing: Determine the time of sunset or sunrise and arrive at least 30 minutes in advance to set up your equipment and find the best composition.
Use the right equipment:
Camera: A DSLR or mirrorless camera is ideal, but modern smartphones can also capture stunning sunrise and sunset photos.
Tripod: Use a stable tripod to keep your camera steady, especially during low-light conditions.
Filters: Consider using a graduated neutral density (ND) filter to balance the exposure between the sky and the foreground.
Composition:
Rule of thirds: Compose your shot using the rule of thirds, placing the horizon one-third from the top or bottom of the frame.
Leading lines: Incorporate leading lines, such as a shoreline or a road, to guide the viewer’s eye toward the sun.
Foreground interest: Include an interesting foreground element, like rocks, trees, or a silhouette, to add depth and context to your photo.
Set the right exposure:
Use Aperture Priority or Manual mode to control settings.
Choose a low ISO (100-400) for minimal noise.
Adjust the aperture to control depth of field. A small aperture (high f-number) like f/16 or f/22 is ideal for capturing the sunburst effect.
Experiment with shutter speed to achieve the desired level of motion in the scene. Longer exposures can create a soft, ethereal effect, while shorter ones freeze the action.
Focus: Manually focus your lens on the subject. Autofocus can struggle in low light conditions.
Use live view mode to magnify the image and ensure your focus is sharp.
White balance:
Adjust your camera’s white balance setting to match the lighting conditions. For warm and vibrant colors, use “Daylight” or “Cloudy.”
Bracketing: Use exposure bracketing to capture multiple shots at different exposures, which you can later blend in post-processing for a balanced image.
Capture silhouettes:
To create striking silhouettes, expose for the sky, and allow the foreground subject to become a dark silhouette.
Post-processing:
Use photo editing software like Adobe Lightroom or Photoshop to enhance your images, adjusting exposure, colors, and sharpness as needed.
Experiment:
Don’t be afraid to experiment with different angles, framing, and techniques. Capturing the perfect sunset or sunrise photo often involves trying different things. My favourite image is the one with the blurred dog and silhouetted couple below. The dog almost dissapears
Be patient:
Weather conditions can change rapidly, so be patient and prepared to wait for the right moment.
Remember, the key to great sunset and sunrise photos is practice. As you gain experience, you’ll develop your style and improve your skills in capturing these magical moments.

